Tuesday, March 31, 2015

3/31- 4/1: INTRODUCTION TO ACTION PHOTOGRAPHY

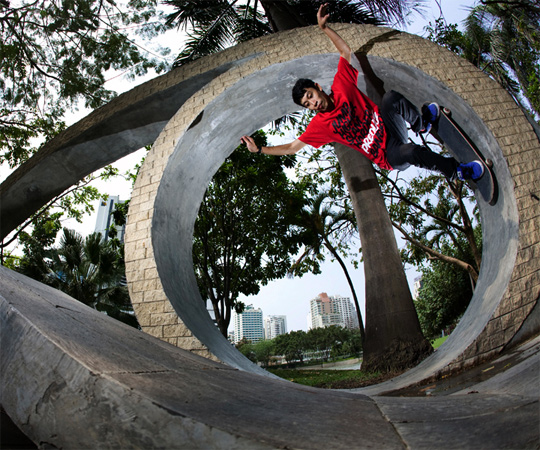
Here is a link to some great action photos. Please notice how most of these photos show engaging action in an interesting location. You will shoot similar photos during our Action Photo unit.

action photographyaction photography

3/31-4/1: COMPLETING DOF UNIT

You will have the rest of class today to finish your DOF pictures and submit them. Here is what should be submitted:
  • Contact sheets: DOF1, DOF2, & DOF3 (highlight your best 3 on each) 
    • Due 3/31 or 4/1
    •   
  • DOFAdjusted(CONTACT SHEET)
    • Worth 100 pts.
    • Due 3/31 or 4/1
    • 12-20 best adjusted images from ALL of your DOF photos.
    • You should include pictures that have a shallow Depth of Field

  • DOFBest:   (JPEG)
    • Worth 100 pts.
    • Due 3/31 or 4/1
    • Your SINGLE BEST DOF image
    • This should be submitted for printing as a maximum quality jpeg

Sunday, March 29, 2015

3/30: MID-TERM REVIEW & ART WOLFE'S PHOTO SUGGESTIONS

Photographer Art Wolfe's suggestions for taking good pictures are in the link below
http://iconicimagesinternational.com/wp-content/uploads/Art-Wolfe-Presentation-Summary-Notes.pdf

Review the following:


  1. Repetition
  2. Rule of Thirds
  3. Selective Focus
  4. Depth of Field, DoF
  5. Aperture
  6. F-stop
  7. Shutter
  8. Changing to Grayscale
  9. Layout - lanscape (horizontal), or portrait (vertical)
  10. Frame within a frame
  11. Mergers
  12. Emphasis
  13. Contrast
  14. Value
  15. Balance: Symmetry/Asymmetry
  16. Composition
  17. Landscapes: Horizon in the upper or lower third
  18. Fill the Frame
  19. Different angles
  20. Correct Exposure
  21. ISO 
  22. Manual Photo 'Triangle' = ISO, Aperture, Shutter

Monday, March 23, 2015

3/24-25: DoF ASSIGNMENTS & DUE DATES

3/24-25: ON-CAMPUS Shoot (Dof Assignment)
  • Titled, DoF1 
  • Highlight your 3 best pics

3/26-27: OFF-CAMPUS Shoot(Dof Assignment repeated, new subjects)
  • Titled, DoF2
  • Highlight your 3 best pics 
3/30 (due date): HOMEWORK Shoot (Dof Assignment repeated, new subjects)
  • Titled, DoF3
  • Highlight your 3 best pics 


3/24-25: SETTING YOUR ISO

ISO is the sensitivity of your camera's sensor to light. Below is a general guide to setting your ISO.
  • 100-200 = Sunny
  • 400 = Overcast & Shade
  • 800-1600 = Indoors & Night 
  • If your camera is on a tripod, you can use lower ISO settings than those above.If you're using flash, you can use lower ISO settings if the subject is within about fifteen feet. Because the camera is supported, you can use longer shutter speeds instead of lower ISO settings.
  • For more on ISO settings, click on the link below.
    ISO SETTING TIPS

Thursday, March 19, 2015

3/24-25: DEPTH OF FIELD ASSIGNMENT

The goal of this assignment is to get a better understanding of how to control Depth of Field (DoF), or the area in your picture that is in focus.  You will experiment with having a shallow DoF, or selective focus, to having a large depth of field where everything may be in focus.  You will take 24 pictures total.  Be sure to be back 20-25 minutes before the end of class and upload your contact sheet titled, DOF1.

BEFORE YOU TAKE YOUR PICTURES:
  1. Set your ISO to__________________. (Ask your teacher for correct setting)
  2. Check that your battery is charged, and lens is clean.
  3. Zoom in completely with your camera.
  4. Take pictures that have 3 ‘objects’ in each image.  One object should be close to you (approximately 2-4’ away from the camera, the second object should be a little further, and the third object can be very far away from you.
  5. USE MANUAL FOCUS- DO NOT CHANGE THE FOCUS ON YOUR LENS BETWEEN THESE SHOTS! Be carefull NOT to move the camera, don't change focus between images, just aperture and shutter speed.

SUBJECT
MODE:
PICTURES # AND APERTURE SETTING:
SHUTTER SPEED
#1
Manual (M)
1. Biggest Aperture (F5.6 or bigger)
2. Close down a few stops (F8)
3. Close down a few more stops (F11 or F16?)
4. Smallest Aperture (F22 or smaller)

Adjust EACH picture for  correct exposure!
#2
Manual (M)
Pictures 5-8: Repeat from  1-4


Adjust EACH picture for  correct exposure!
#3
Manual (M)
Pictures 9-12: Repeat from  1-4
Adjust EACH picture for  correct exposure!
#4
Aperture Priority (A)
Pictures 13-16: Repeat from  1-4


Camera will do automatically
#5
Aperture Priority (A)
Pictures 17-20: Repeat from  1-4


Camera will do automatically
#6
Aperture Priority (A)
Pictures 21-24: Repeat from  1-4


Camera will do automatically

TIPS & SUGGESTIONS:
  1. Use your notes and handouts from class.
  2. Check that you know how to:
    1. Change the Aperture (F-stops).
    2. Change the shutter speed.
    3. Change and use the Manual and Aperture Priority modes.
    4. Meter your image to get the correct exposure.
  3. Be sure to focus before you take your picture
  4. Use a tripod.  If you do not use a tripod, be aware that you will likely have blurry pictures at shutter speeds slower than 1/30, so at least stabilize yourself by anchoring your arms.
  5. As always, compose your images carefully, and pick interesting subject matter.  People may be a good subject for some of your images.
  6. Experiment with how far away subjects are from your camera, as that effects DoF

3/19-20: APERTURE AND DEPTH OF FIELD

Your next assignment will focus on Depth of Field. To learn more about exposure and DOF (Depth of Field), please see the information below, which is from the book "Photography," by Upton and Upton.


Tuesday, March 17, 2015

3/17-3/18: UNDERSTANDING MANUAL CAMERA WORK

Manual Adjustments:Aperture and Shutter Speed

Please watch and take notes on both videos below:
Manual Settings Video
Manual Settings Video 2

Manual Adjustments:Aperture and Shutter Speed
http://cybercollege.com/tvp012.htm
http://www.picturecorrect.com/photographytips/208/aperture_fstops_camera_settings.htm

F-Stops and Shutter Speed Hints

Please take detailed notes in your own words on the top two reading assignment. You will using the material you learn this week on the cameras. Use the cameras simulators below when you are done.

Camera simulator:
http://www.photonhead.com/simcam/shutteraperture.php

http://www.kamerasimulator.se/eng/?page_id=2

http://dryreading.com/camera/index.html

htthttp://camerasim.com/camera-simulator/

Monday, March 16, 2015

3/16: INTRODUCTION TO DSLR CAMERAS

To begin understanding a DSLR camera, you will want to know the what the basic camera components are, how they function, and how it takes a picture. Take notes as you read.

Use the link below to label your DSLR camera diagram:

Use the link below, and go to the "Digital SLR Camera Controls on the Top" section
to label the camera LENS diagram:

Click on the link below to see how a DSLR camera operates to take a photograph.

Thursday, March 12, 2015

3/12 & 3/13: GRAYSCALE COMPLETION & RESUBMITTING LANDSCAPES


Today in class you should use the methods we went over to change your images in to grayscale. Please see your notes or refer to my 3/5 & 3/6 blog post.  
TODAY you will submit the following:
  • Titled: GrayscaleAdjusted
    • A contact sheet of your best 20-24 images from all of your grayscale images. Try to show an equal number of pattern, emphasis, value, natural light shadow, and artificial light shadow pictures.
  •  Titled: GrayscaleBest
    • Your best grayscale image to print saved as highest quality JPEG

RESUBMITTING LANDSCAPE WORK:
Please check your grades for the Landscape Adjusted Contact Sheet and the Landscape Best. If you would like to take more pictures and resubmit them for a better grade, you have two weeks to resubmit them and still receive full credit.

Thursday, March 5, 2015

3/5 - 3/6: CONVERTING TO BLACK & WHITE IN PHOTOSHOP

Please take notes (I will be checking your notes!) as I go over the following techniques for converting images to black and white in Photoshop CS5.

The techniques are:
1. Black and White Adjustment Layer
2. Converting to grayscale
3. Hue/Saturation adjustment layer
4. LAB Color Method
5. Gradient Map
6. Channel Mixer

You are required to utilize and know all of the above mentioned adjustments for converting an image from color to black and white. All black and white adjustments are covered in this article: http://photo.tutsplus.com/tutorials/post-processing/7-black-and-white-photoshop-conv ersion-techniques/ 

Tuesday, March 3, 2015

SUBMITTING TO TATTOO DUE: 3/13


You are required to submit 1 photo (edited) to Tattoo by 3/13. You receive extra credit for any additional photos that you submit.

To submit:
  1. Go to the SC website: http://schools.shorelineschools.org/shorecrest/
  2. Now go to the link is on the home page of the SC website (bottom right hand corner, "Submit to Tattoo Here."

3/3: GRAYSCALE TIPS & HOMEWORK & NEXT OFF-CAMPUS SHOOT


Please take notes from the following websites for tips on taking black and white photos.
By the way, if you have not made a new folder on your desktop for your GRAYSCALE picture, please do so!
Grayscale Homework is DUE: Mon. 3/9. You will shoot the following for your assignment.
  • 24 pictures focusing on natural light (sun and moon) shadows
  • Titled: GrayscaleNatShadCS2 (These will be in color still!)
  • HIGHLIGHT THE NUMBERS OF YOUR BEST 1-3 IMAGES!! 
Next OFF-CAMPUS SHOOT is Tues. 3/10 (per 4) & Wed. 3/11 (per 5). You will shoot the following for your assignment.
  • 24 pictures involving man-made shadows
  • Titled: GrayscaleMMShadCS3 (These will be in color still!)
  • HIGHLIGHT THE NUMBERS OF YOUR BEST 1-3 IMAGES!!