Tuesday, February 28, 2017

2/28: Photoshop Toolbar & Shortcuts

2/28: HIGHLIGHTING IMAGES ON CONTACT SHEET

HIGHLIGTING IMAGES ON YOUR CONTACT SHEET:
  • After you have saved your contact sheet to the desktop, open it up as a PDF.  Click on the highlight text button at the top of your contact sheet. If you don't have this button, click on the annotate button on the top of your contact sheet. A highlighting icon should show up on the bottom of your sheet. Now highlight your best 1-3 images.

2/28: DIGITAL CAMERA ICONS & MODES

For help with digital camera icons & modes go to:
http://misterriggs.com/archives/category/digital-photography

Monday, February 27, 2017

2/27: COMPOSITION HOMEWORK DUE 3/7

For homework you will shoot at least 48 pictures and that focus on the below.  
You will turn in your 24 best labeled  with what topic they are. Title your contact sheet: Per_Lastname_FirstName_Comp2.
Please shoot the following:
  • 4 shots focusing on the Simplicity
  • 4 shots focusing on creating a focal point
  • 4 shots focusing on using diagnols
  • 4 shots focusing on Asymmetrical Balance shots
  • 4 shots focusing on Symmetrical Balance shots 
  • 4 shots focusing on Color Contrast (using other objects to frame your subject) 

2/27: 10 RULES OF PHOTO COMPOSITION (AND WHY THEY WORK)

10 rules of photo composition (and why they work)
| Photography Tips | 12/04/2012 16:33pm
5 Comments
In photography, it’s not just what you shoot that counts – the way that you shoot it is crucial, too. Poor photo composition can make a fantastic subject dull, but a well-set scene can create a wonderful image from the most ordinary of situations. With that in mind, we’ve picked our top 10 photo composition ‘rules’ to show you how to transform your images, as well as offered some of our best photography tips from the experts who do it on a daily basis.

10 rules of photo composition (and why they work)
Don’t feel that you’ve got to remember every one of these laws and apply them to each photo you take. Instead, spend a little time practising each one in turn and they’ll become second nature. You’ll soon learn to spot situations where the different rules can be applied to best effect.
Photo composition doesn’t have to be complicated. There are all sorts of theories about the ‘Rule of Thirds’ and more complex ‘Golden Mean’, for example. But if you pay too much attention to strict formulae, your photos will lose any kind of spontaneity.
In the real world, you’ll be working with a wide range of subjects and scenes, and this requires a more open-minded approach. What works for one photo won’t necessarily work for another.
The key thing is to understand how all the decisions you make about composition can affect the way a shot looks and how people perceive your photos. The way you frame a shot, choose a focal length or position a person can make all the difference (check out our Photography Cheat Sheet series for quick fixes to some of these problems).
Technical know-how is very important in photography, of course, and even in some aspects of photo composition. But to take great shots you need visual knowledge too. Here are 10 key things to look out for…

10 rules of photo composition (and why they work)


Photo Composition Tip 1: Simplify the scene

10 rules of photo composition (and why they work)
Image copyright Jure Kravanja
When you look at a scene with your naked eye, your brain quickly picks out subjects of interest. But the camera doesn’t discriminate – it captures everything in front of it, which can lead to a cluttered, messy picture with no clear focal point.
What you need to do is choose your subject, then select a focal length or camera viewpoint that makes it the centre of attention in the frame. You can’t always keep other objects out of the picture, so try to keep them in the background or make them part of the story.
Silhouettes, textures and patterns are all devices that work quite well in simple compositions.

Why it works…

10 rules of photo composition (and why they work)

Photo Composition Tip 2: Fill the frame

10 rules of photo composition (and why they work)
Image copyright Jure Kravanja
When you’re shooting a large-scale scene it can be hard to know how big your subject should be in the frame, and how much you should zoom in by. In fact, leaving too much empty space in a scene is the most widespread compositional mistake (learn how to Replace boring skies in Photoshop). It makes your subject smaller than it needs to be and can also leave viewers confused about what they’re supposed to be looking at.
To avoid these problems you should zoom in to fill the frame, or get closer to the subject in question. The first approach flattens the perspective of the shot and makes it easier to control or exclude what’s shown in the background, but physically moving closer can give you a more interesting take on things (see our list of Digital camera effects from A-Z).
Why it works…
10 rules of photo composition (and why they work)

Photo Composition Tip 3: Aspect ratio

10 rules of photo composition (and why they work)
Image copyright Andy Lea
It’s easy to get stuck in a rut and take every picture with the camera held horizontally. Try turning it to get a vertical shot instead, adjusting your position or the zoom setting as you experiment with the new style. You can often improve on both horizontal and vertical shots by cropping the photo later.
After all, it would be too much of a coincidence if all your real-life subjects happened to fit the proportions of your camera sensor. Try cropping to a 16:9 ratio for a widescreen effect, or to the square shape used by medium-format cameras.
Why it works…
10 rules of photo composition (and why they work)

Photo Composition Tip 4: Avoid the middle

10 rules of photo composition (and why they work)
Image copyright Piriya Pete Wongkongkathep
When you’re just starting out, it’s tempting to put whatever you’re shooting right in the centre of the frame. However, this produces rather static, boring pictures. One of the ways to counteract this is to use the Rule of Thirds, where you split the image up into thirds, both horizontally and vertically, and try to place your subject on one of these imaginary lines or intersections. This is an overrated approach, though.
Instead, move your subject away from the centre and get a feel for how it can be balanced with everything else in the scene, including any areas of contrasting colour or light. There are no hard and fast rules about achieving this kind of visual balance, but you’ll quickly learn to rely on your instincts – trust that you’ll know when something just looks right.
Why it works…
10 rules of photo composition (and why they work)

Photo Composition Tip 5: Leading lines

10 rules of photo composition (and why they work)
Image copyright Fernand Hick
A poorly composed photograph will leave your viewers unsure about where to look, and their attention might drift aimlessly around the scene without finding a clear focal point. However, you can use lines to control the way people’s eyes move around the picture.
Converging lines give a strong sense of perspective and three-dimensional depth, drawing you into an image. Curved lines can lead you on a journey around the frame, leading you towards the main subject.
Lines exist everywhere, in the form of walls, fences, roads, buildings and telephone wires. They can also be implied, perhaps by the direction in which an off-centre subject is looking.
Why it works…
10 rules of photo composition (and why they work)

Photo Composition Tip 6: Use diagonals

10 rules of photo composition (and why they work)
Image copyright Jure Kravanja
Horizontal lines lend a static, calm feel to a picture, while vertical ones often suggest permanence and stability. To introduce a feeling of drama, movement or uncertainty, look for diagonal lines instead.
You can need nothing more than a shift in position or focal length to get them – wider angles of view tend to introduce diagonal lines because of the increased perspective; with wide-angle lenses you’re more likely to tilt the camera up or down to get more of a scene in.
You can also introduce diagonal lines artificially, using the ‘Dutch Tilt’ technique. You simply tilt the camera as you take the shot. This can be very effective, though it doesn’t suit every shot and is best used sparingly (see our 44 essential digital camera tips and tricks).
Why it works…
10 rules of photo composition (and why they work)

Photo Composition Tip 7: Space to move

10 rules of photo composition (and why they work)
Image copyright Max Earey
Even though photographs themselves are static, they can still convey a strong sense of movement. When we look at pictures, we see what’s happening and tend to look ahead – this creates a feeling of imbalance or unease if your subject has nowhere to move except out of the frame.
You don’t just get this effect with moving subjects, either. For example, when you look at a portrait you tend to follow someone’s gaze, and they need an area to look into (check out our Free portrait photography cropping guide).
For both types of shot, then, there should always be a little more space ahead of the subject than behind it.

Why it works…

10 rules of photo composition (and why they work)

Photo Composition Tip 8: Backgrounds

10 rules of photo composition (and why they work)
Image copyright John Powell
Don’t just concentrate on your subject – look at what’s happening in the background, too. This ties in with simplifying the scene and filling the frame. You can’t usually exclude the background completely, of course, but you can control it.
You’ll often find that changing your position is enough to replace a cluttered background with one that complements your subject nicely (find out how to Fix background distractions in 3 steps). Or you can use a wide lens aperture and a longer focal length to throw the background out of focus.
It all depends on whether the background is part of the story you’re trying to tell with the photo. In the shot above, the background is something that needs to be suppressed.
Why it works…
10 rules of photo composition (and why they work)

Photo Composition Tip 9: Creative with colours

10 rules of photo composition (and why they work)
Image copyright Jure Kravanja
Bright primary colours really attract the eye, especially when they’re contrasted with a complementary hue. But there are other ways of creating colour contrasts – by including a bright splash of colour against a monochromatic background, for example. You don’t need strong colour contrasts to create striking pictures, though (find out How to conquer high contrast with auto-exposure bracketing).
Scenes consisting almost entirely of a single hue can be very effective. And those with a limited palette of harmonious shades, such as softly lit landscapes, often make great pictures.
The key is to be really selective about how you isolate and frame your subjects to exclude unwanted colours.

Why it works…

10 rules of photo composition (and why they work)

Photo Composition Tip 10: Breaking the rules

10 rules of photo composition (and why they work)
Image copyright John Powell
Photo composition is a little like a visual language – you can use it to make your pictures pass on a specific message. However, just as we sometimes use the written word to create a deliberately jarring effect, we can do the same with photos by breaking with standard composition conventions.
Doing it by accident doesn’t count, though! It’s when you understand the rules of composition and then break them on purpose that things start to get interesting. It’s often best to break one rule at time, as John Powell does in the image above.
Just remember: for every rule we suggest, somewhere out there is a great picture that proves you can disregard it and still produce a fantastic image!

Why it works…
10 rules of photo composition (and why they work)

Thursday, February 16, 2017

OFF CAMPUS LANDSCAPE PHOTO SHOOT 2/16


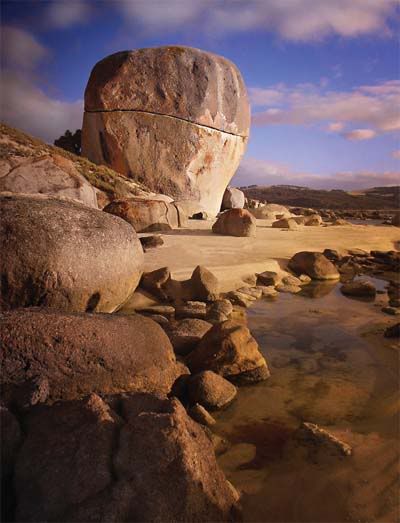
Pick a scenic location where you can take pictures for your off-campus photo shoot. This should be a place with water, mountains, trees, or a combination of all of the above. I would recommend Carkeek Park, Kerry Park, or Richmond Beach. For your off-campus photo shoot, know where you are going beforehand, bring your camera and arrange your transportation.
  • You will shoot at least 48 pictures at your location.
  • You will turn in YOUR BEST 24 landscape pictures as contact sheets at the end of class on CANVAS. They should turn in 2 contact sheets of 12 pictures per contact sheet. Be sure to create a folder on your desktop titled LANDSCAPES.
  • Title the contact sheets: Per_LastName_FirstName_LandscapeCS1Feb16
  1. Make sure each shot has a large depth of field. In other words, make sure even the background objects are in focus.
  2. In each shot make sure you have foreground, middleground, and background objects.
  3. Most Landscape shots will have water, trees, and mountains.
  4. Change angles and move all around the location.
  5. Shoot horizontal and vertical landscape pictures.
  6. Do not center the horizon. Place it in the upper or lower third.
  7. Look for lines on the ground or even in the sky.
  8. Use tripods as needed.
  •  

Tuesday, February 14, 2017

2/14/17: LANDSCAPE HOMEWORK OVER BREAK DUE: (Tues.) 2/28

During the break, you will take landscape pictures from at least two new locations. You should take at least 48 pictures at each location, or about 100 photos in total (2 x 48 =96). You will turn in your best 48 images (24 pictures from each location). Some people will take 200+ shots to get 48 good images. Be prepared, and keep your camera on you as much as possible. 
  • DUE: Tuesday 2/28 
  • You must shoot at least once during sunrise or sunset. 
  • For tips see below. 
  • You will turn in your best 24 pictures from each location. (2 x 24 = 48 pictures total) 
  • You will create contact sheets with 24 pictures from each location. Be sure that your contact sheets have 12 images each. This means that you will turn in 2 contact sheets per location.
  • HIGHLIGHT THE NUMBERS OF YOUR BEST 1-3 IMAGES ON EACH CONTACT SHEET AND THEN UPLOAD TO CANVAS.
  • Title the accordingly:
    • Per_LastName_FirstName_LandscapeCS2MWBreak
    • Per_LastName_FirstName_LandscapeCS3MWBreak
TIPS:
  1. Make sure each shot has a large depth of field. In other words, make sure even the background objects are in focus.
  2. In each shot make sure you have foreground, middleground, and background objects.
  3. Most Landscape shots will have water, trees, and mountains.
  4. Change angles and move all around the location.
  5. Shoot horizontal and vertical landscape pictures.
  6. Do not center the horizon. Place it in the upper or lower third.
  7. Look for lines on the ground or even in the sky.
  8. Use tripods as needed.
  9. Look up more tips online!
  •  

Monday, February 13, 2017

2/13/17-2/14/17: INTRO TO LANDSCAPE PHOTOGRAPHY


Spend 30-35 minutes to read the following articles. Take short notes on each suggestion. A few of the readings repeat the same points. Also, make sure you look up the vocabulary words below so that you can understand the material. Please add these terms to your notes as well. Upload your notes to Canvas.


Terms to look up and become familiar with: 
Shutter Speed
Aperture
Depth of Field
Focal Point
Slow Exposure

 
11 Landscape Hints
10 Landscape Hints


Ocean Blur: how to take long exposure pictures of the sea using an ND filter

http://i45.photobucket.com/albums/f93/pospisil/landscape.jpg

Thursday, February 9, 2017

2/9: In Class Composition Photo Shoot

Take at least 24-36 pictures today and focus on the below topics. At the end of class, you will select your best 12 shots that include the below, create a contact sheet, and turn them in on Canvas. Title your contact sheet: LastName_ FirstName_CompCS1
Please shoot the following:

  • 3 shots focusing on the Rule of Thirds 
  • 3 shots focusing on Fill the Frame shots
  • 3 shots focusing on Leading Lines shots 
  • 3 shots focusing on Frame within a Frame (using other objects to frame your subject) 

Tuesday, February 7, 2017

2/7: A TRIPLE DOZEN OF ONE OBJECT: HOMEWORK DUE: 2/14

A TRIPLE DOZEN OF ONE OBJECT ASSIGNMENT:
  • HOMEWORK DUE: TU. 2/14
  • Take at least 6 dozen pictures (72 pics!) of one object
  • Select your best triple dozen pictures (36 pics) and then submit 3 contact sheets of 12 images each
  • Titled: LastName_FirstInitial_TRIPLEDOZEN
As a way to really push experimentation, you will take photos one object and submit 36 images of that object. The goal is to make each image unique, and visually interesting. Be sure to pick an interesting object, &/or make the object interesting by being clever and using variety. Set up the object in one way, photograph it from at least 5 different angles in this first setting. Change the setup and repeat. For the rest of the images, continue to change angles, environments, lighting, surrounding objects, image orientation, color schemes, distance from the camera, consider making a social or political statement, etc. Have fun!

Your grade for this assignment will be based on the following factors: 
  • Completion of each image turned in on a contact sheet and properly labeled.
  • Turned in on time (formative)
  • The quality and creativity of your 36 best images
  • Your ability to follow exact directions and with the submission procedures

2/7: DIGITAL PHOTO COMPOSITION READINGS

This is not a writing intensive course, but there is some reading the first couple weeks of class. Please take notes on the bold faced words as you read from the links below. These tips will be helpful for your future development as a photographer. You will also be shooting the various composition elements this weekend and next week.
  • Take notes and up load them to Canvas for a grade.
  • We will also have a quiz on this material as well.
  • Bring your cameras to class every day.

In Class reading:


http://photoinf.com/General/Geoff_Lawrence/Composition.html


http://asp.photo.free.fr/Composition/photoProgramCompMainClass

Thursday, February 2, 2017

2/2/17: CREATING A CONTACT SHEET IN ADOBE BRIDGE

Put your SD card into the back of the computer or plug in your camera using a USB chord.

1. Import your pictures using Image Capture. Be sure that on the bottom you select Import To: PICTURES!
2. Create a folder on your computer with appropriate title.
3. Drag the pictures you want to use in this Contact Sheet  into this new folder.
4. Open Adobe Bridge CS5
5. On left hand side find your folder and select it.
6. Select the files down below so that they show up in the Preview section. You can select the pictures via lasso, shift key, or command key.
7. In the document section on the right, select the paper size (A4), the quality (300 ppi), and the background (white).

8.  On the right hand side select Output. Make sure .pdf is selected.
9.  Columns and rows will vary, so in the layout section on the right input accordingly:

  • 6 pictures means columns and rows=2*3
  • 12 pictures means columns and rows=3*4
  • 24 pictures means columns and rows=4*6

10. In the output menu on the right top, create a custom template by selecting the document icon and naming it "12 images" or whatever is the correct number of images. This step is important as you will be using this template for the rest of the semester.
11.  In the output menu, click "refresh preview."
12. Click save in the lower right hand corner. Save to your pictures folder.
13. Be sure to name your contact sheet what the assignment it and to save it in organized folder system on your desktop 
14. Upload to the Canvas.